
ZELDA OVERLAY RUNES (FREE PATTERN!)
As part of my ongoing tutorial series over Twilight Princess Zelda, I decided to release some clear photos of my overlay pattern to help those who are also trying to piece together this rune design. My interpretation was cobbled together from multiple incomplete references that were at times contradictory and/or unclear. So it’s as accurate as I could manage given the circumstances!
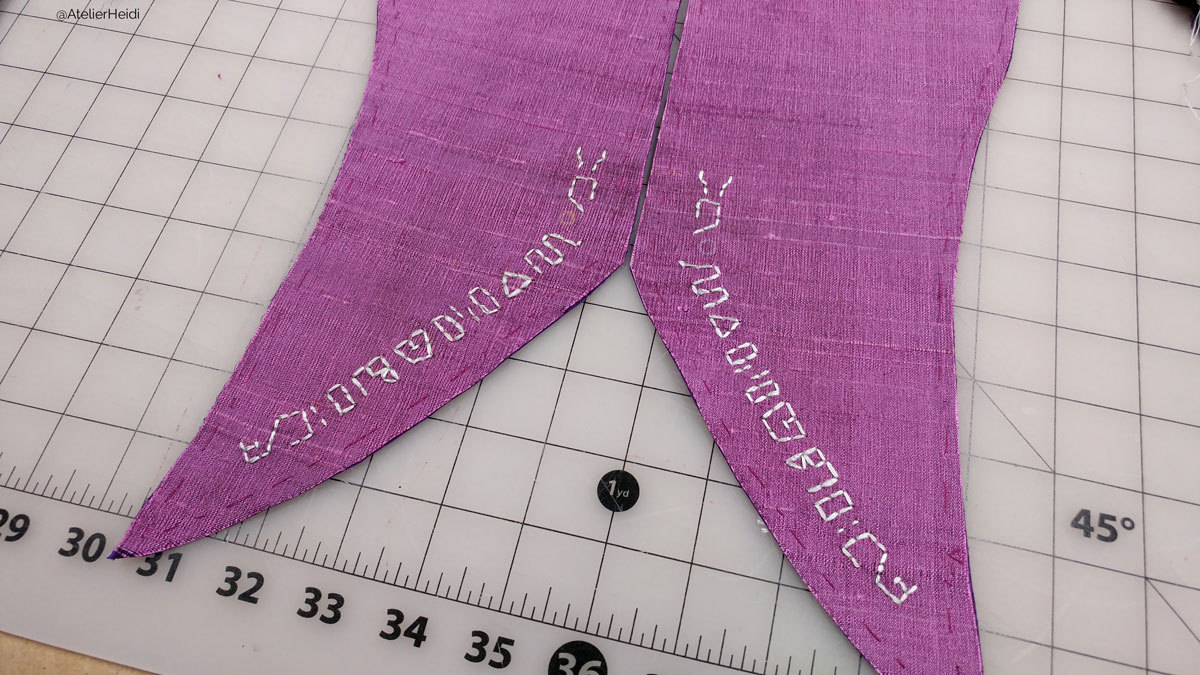
I copied this pattern to my silk with a white fabric pencil, then hand-embroidered the design with a simple backstitch. The fabric is silk dupioni underlined with cotton sateen; the embroidery is stitched through both layers. I used a satin floss (DMC S712: Mother of Pearl) so that the thread would match the sheen of the silk beneath it.
If you aren’t feeling up to embroidering it, silk screening or hand-painting are also options.
The gold leaf designs bracketing the eyelets (pictured above) are made from small decorative brass stampings. I clipped the leaves from a larger stamping, drilled tiny holes with a jewelry hole punch, and hand-stitched them onto the dress. This is just my own take on the design – Zelda has something of a leaf motif that I wanted to incorporate in areas where the references were unclear.
To see more of my Twilight Princess Zelda tutorials, check my tutorials section! All of my other Zelda patterns are available in my store. Read on below for the free rune pattern.
I’ve been having some problems getting these images to display properly on mobile. If you’re planning to use this reference I highly suggest viewing it on desktop.
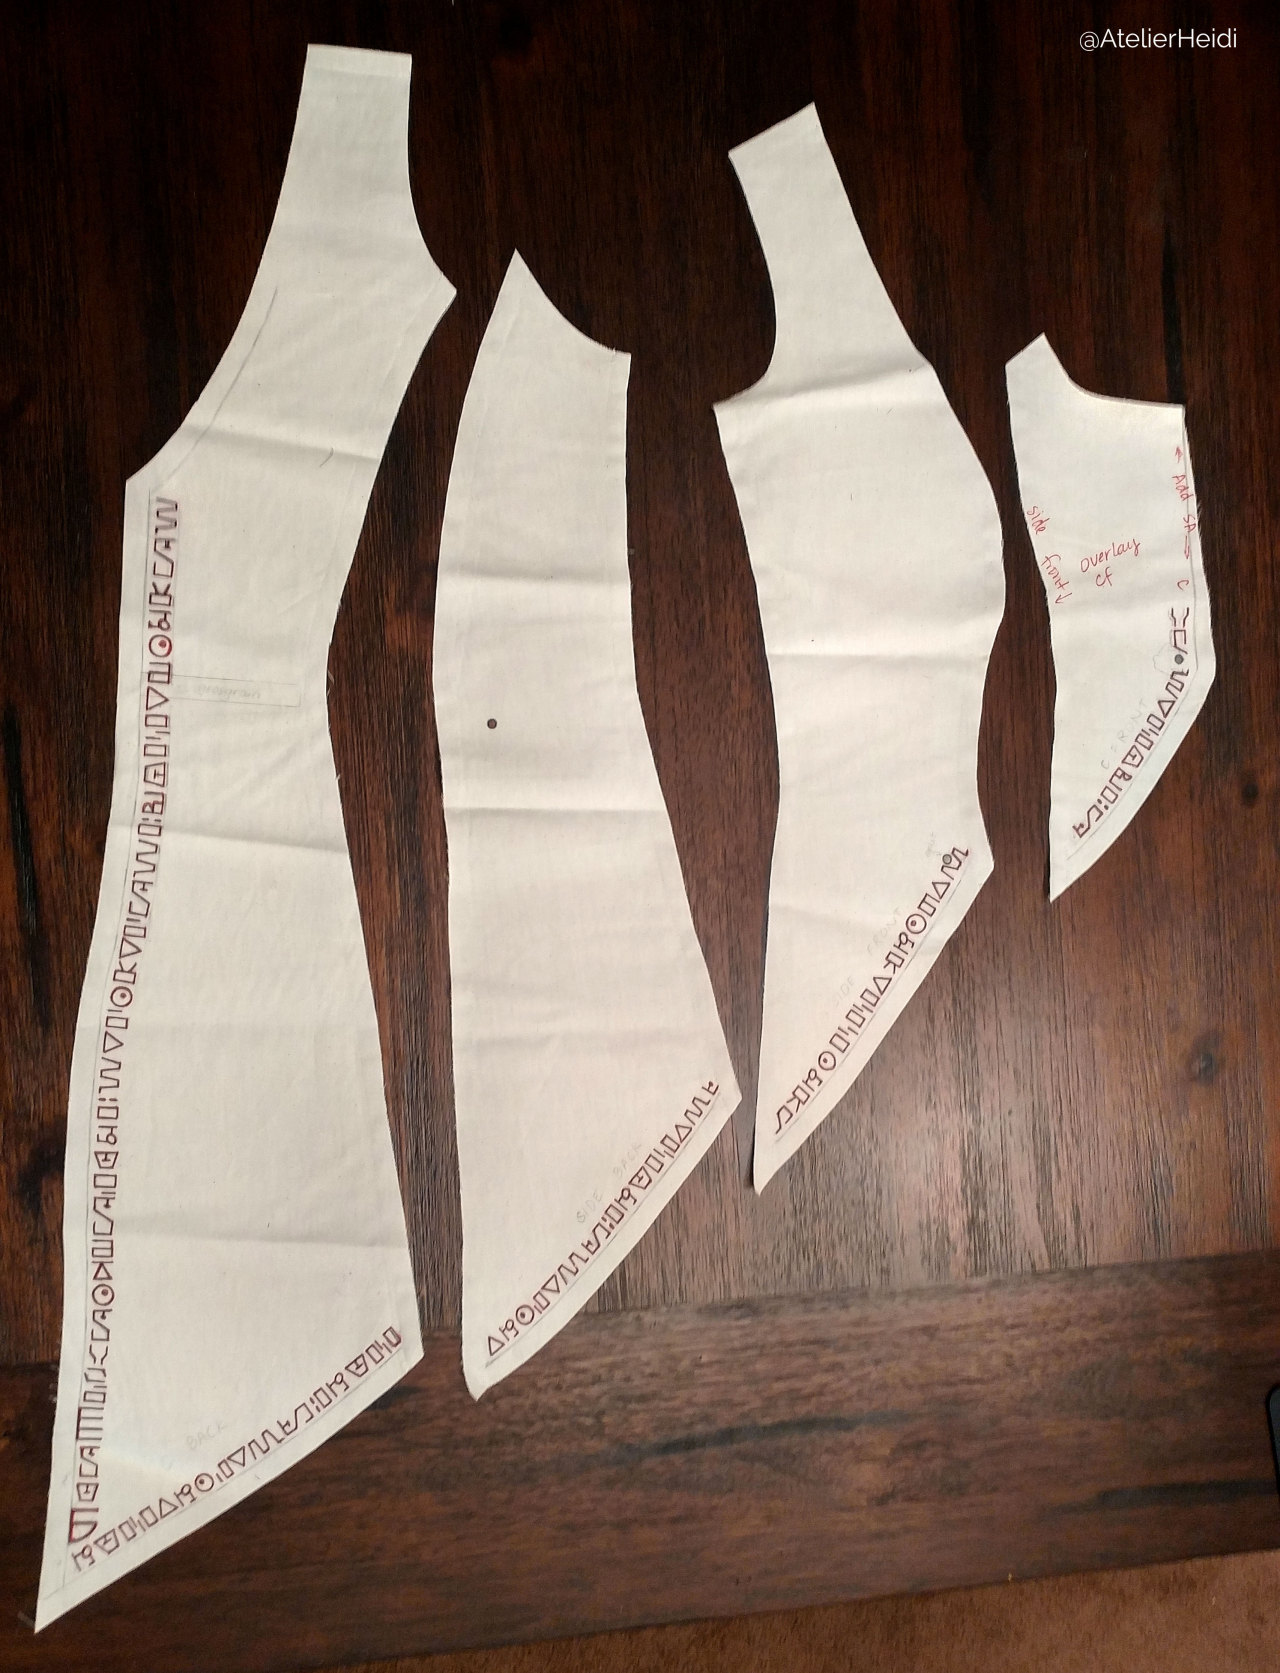
Here’s a full look at my final mockup for the overlay. This was made to my measurements, but could be easily adjusted to accommodate other sizes. All pieces include a 1/2″ seam allowance.

The center back piece includes some additional eyelets not pictured here.
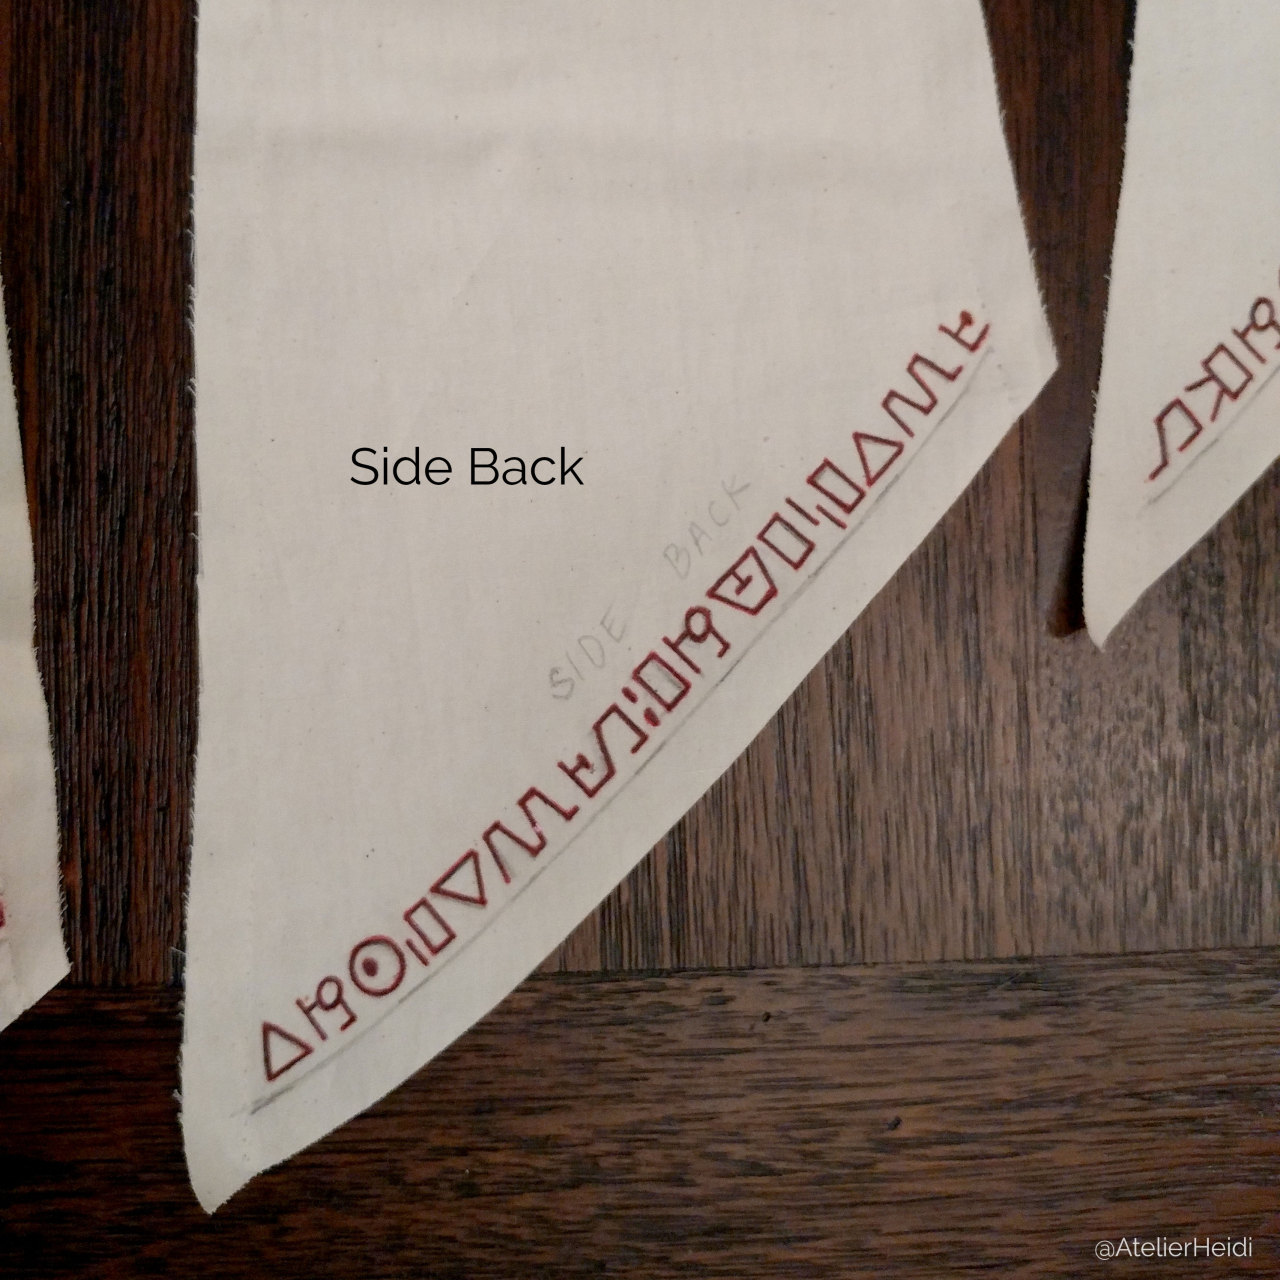
The side back piece has an additional eyelet near the waistline, not pictured here.

The side front and center front both include eyelets that are placed extremely close to the embroidery design. I embroidered first and installed the eyelets afterward.

A final look at my complete Zelda costume. Photo by @saterialeproductions

For more Zelda tutorials, check my tutorials section! You can find more patterns for Zelda’s accessories and applique in my store.
Thanks for reading and good luck!
If this tutorial helped you out, consider supporting my work through Ko-fi!
You can also access extra updates by becoming a monthly subscriber on Ko-fi.